☃️ Crochet Olaf – Your Little Snowy Friend Full of Smiles! 😊❄️
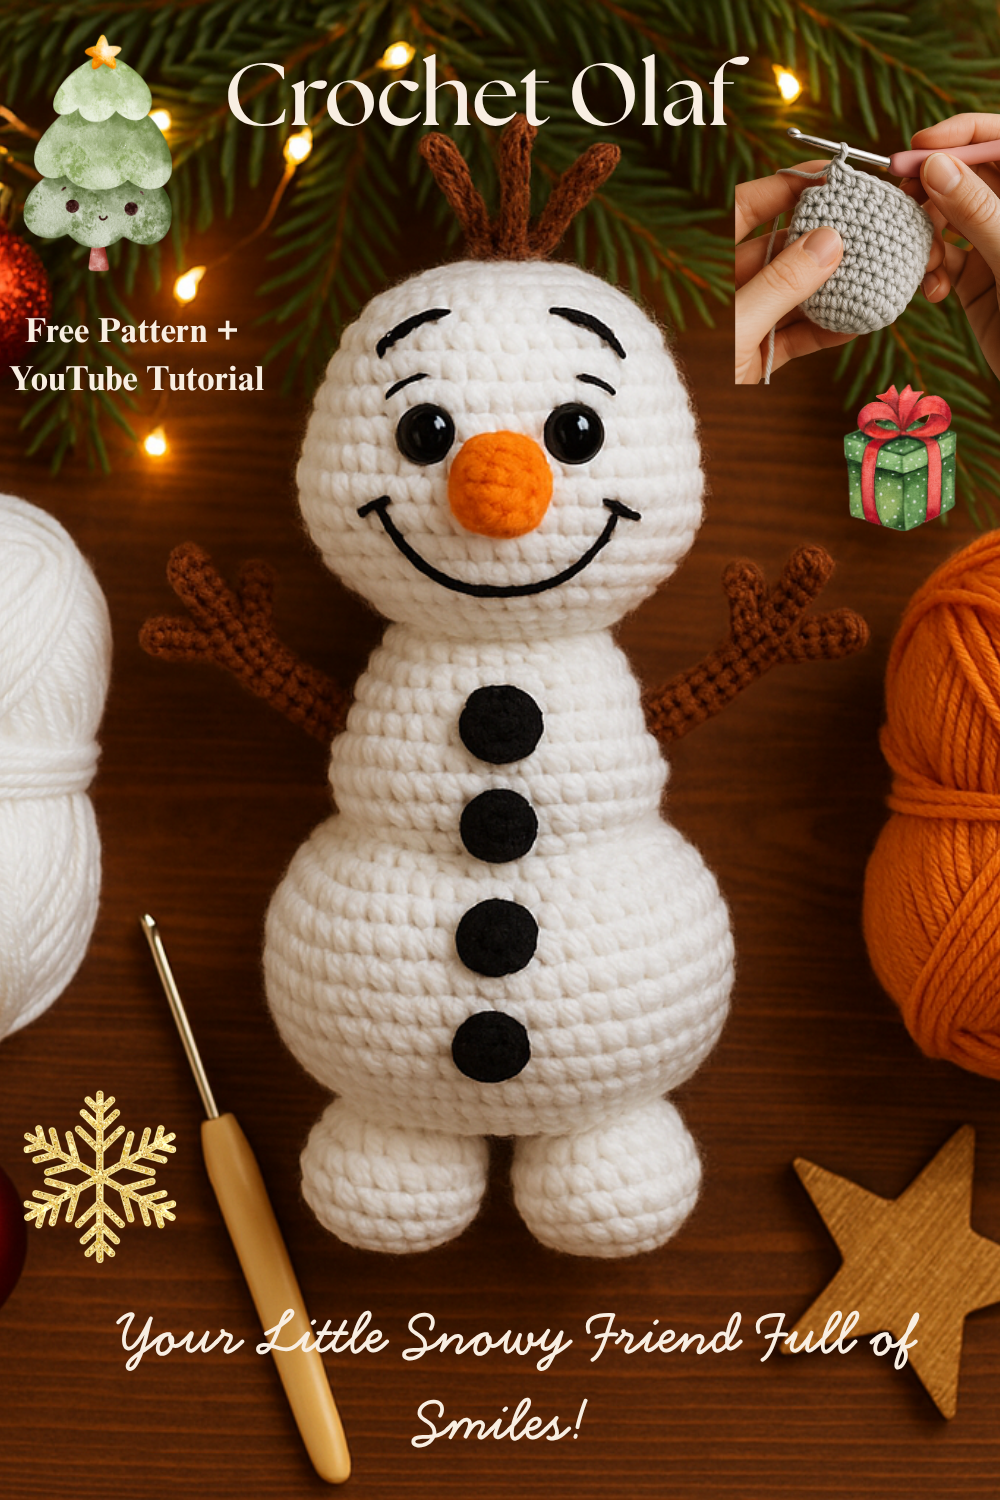
There’s something absolutely magical about Olaf — that warm-hearted snowman who dreams of summer and hugs! 🥰 His big eyes, carrot nose, and endless cheer make him one of the most lovable winter characters ever, and crocheting your very own Olaf brings all that happiness right into your cozy Christmas season! 🎄✨
Imagine sitting by the twinkling tree, cup of hot cocoa in hand, crocheting those little white snowballs that soon become Olaf’s smiley face and adorable chubby body. 🧶 Every stitch feels like wrapping up a bit of joy — it’s not just crafting, it’s creating happiness that lasts through every snowy holiday! 😊
Crocheting Olaf is such a delightful way to celebrate the Christmas spirit. He reminds us that winter isn’t just about the cold — it’s about warmth, love, and laughter that we share with our families. ❤️ Olaf’s bright personality instantly fills any home with cheer — you can place him under the Christmas tree, beside your favorite festive mug, or even as part of your holiday décor on the fireplace mantle. He fits anywhere smiles belong! 🎁❄️
Making him by hand adds that extra sparkle — because handmade gifts always hold a little piece of your heart. 💖 Whether you’re making Olaf for your child, your grandchild, or even your best friend, he’ll become a forever keepsake — a soft, squishy snowman full of memories and holiday hugs. 🤗 Kids especially love his silly carrot nose and friendly grin — he’s a little buddy to cuddle during Christmas movies or snowy mornings! 🌨️
And let’s be honest — how can anyone resist that cute face? 🥕😂 Olaf is the definition of cozy happiness. Each time you look at your crocheted snowman, you’ll remember the peaceful moments spent creating something beautiful with your own hands. It’s the perfect project for December evenings — calm, creative, and full of seasonal joy. 🌟
Even beginners can enjoy this pattern — simple stitches come together quickly, and before you know it, you’ve made a snowman with personality! 🧣 You can customize him with a tiny scarf, sparkly buttons, or even a Santa hat to make him extra festive. 🎅🏻
If you love giving meaningful gifts, crocheted Olaf is the sweetest surprise ever! 🎁 Wrap him in tissue paper, add a handwritten tag saying “Some people are worth melting for”, and you’ve got the perfect handmade Christmas present that melts hearts instantly. ❤️
So grab your yarn, hook, and your happiest playlist — it’s Olaf time! 🧶❄️ Bring a little Disney magic, a lot of Christmas sparkle, and endless smiles to your home this season. Because when you crochet Olaf, you’re not just making a snowman — you’re stitching pure joy, one smile at a time! 😊☃️💫
🧶 Written Pattern Description
Below is a detailed description of how you’d crochet Olaf. Adjust hook size or yarn weight as desired, but the instructions follow a typical amigurumi style. Have fun!
Materials
- White yarn (body)
- Orange yarn (nose)
- Black yarn or embroidery thread (buttons, details)
- Brown yarn (arms, twigs/hair)
- Black beads (for eyes) or safety eyes
- Fiberfill stuffing
- Crochet hook (for example around 2.0 mm for small size)
- Tapestry needle, scissors
Abbreviations
- mc = magic circle
- ch = chain
- sc = single crochet
- inc = increase (2 sc in same stitch)
- dec = single crochet two stitches together
- st(s) = stitch/es
- BLO = back loop only
Head
With white yarn:
- R1: 6 sc in mc (6)
- R2: (inc)×6 → 12
- R3: (1 sc, inc)×6 → 18
- R4: (2 sc, inc)×6 → 24
- R5: (3 sc, inc)×6 → 30
- R6: (4 sc, inc)×6 → 36
- R7: (5 sc, inc)×6 → 42
- R8-14: 42 sc around (7 rows)
- R15: 7 sc, 8 inc, (1 sc, inc)×6, 8 inc, 7 sc → 64
- R16-21: 64 sc around (6 rows)
- R22: 7 sc, 8 dec, 18 sc, 8 dec, 7 sc → 48
- R23: 48 sc around
- R24: (6 sc, dec)×6 → 42
- R25: 42 sc around
- R26: (5 sc, dec)×6 → 36
- R27: 36 sc around
- R28: (4 sc, dec)×6 → 30
- R29: 30 sc
- R30: (3 sc, dec)×6 → 24
- R31-32: 24 sc (2 rows)
Finish off and leave a tail for sewing. (Pattern adapted from one free pattern source.) amigurum.com+1
Body
With white yarn:
- R1: 6 sc in mc (6)
- R2: (inc)×6 → 12
- R3: (1 sc, inc)×6 → 18
- R4: (2 sc, inc)×6 → 24
- R5: (3 sc, inc)×6 → 30
- R6: (4 sc, inc)×6 → 36
- R7: (5 sc, inc)×6 → 42
- R8: (6 sc, inc)×6 → 48
- R9: (7 sc, inc)×6 → 54
- R10: (8 sc, inc)×6 → 60
- R11: (9 sc, inc)×6 → 66
- R12: (10 sc, inc)×6 → 72
- R13-20: 72 sc (8 rows)
- R21: (10 sc, dec)×6 → 66
- R22: 66 sc
- R23: (9 sc, dec)×6 → 60
- R24: 60 sc
- R25: (8 sc, dec)×6 → 54
- R26: 54 sc
- R27: (7 sc, dec)×6 → 48
- R28: 48 sc
- R29: (6 sc, dec)×6 → 42
- R30: 42 sc
- R31: (5 sc, dec)×6 → 36
- R32: (4 sc, dec)×6 → 30
- R33: (3 sc, dec)×6 → 24
- R34: (3 sc, inc)×6 → 30
- R35: (4 sc, inc)×6 → 36
- R36: (5 sc, inc)×6 → 42
- R37-41: 42 sc around (5 rows)
- R42: (5 sc, dec)×6 → 36
- R43: 36 sc
- R44: (4 sc, dec)×6 → 30
- R45: 30 sc
- R46: (3 sc, dec)×6 → 24
- R47: 24 sc
Finish off and leave tail for sewing. Pattern source.
Feet (make 2)
With white yarn:
- R1: 6 sc in mc (6)
- R2: (inc)×6 → 12
- R3: (1 sc, inc)×6 → 18
- R4-6: 24 sc (3 rows)
- R8: (2 sc, dec)×6 → 18
- R9: (1 sc, dec)×6 → 12
Stuff and finish off leaving tail for sewing.
Nose (Carrot)
With orange yarn:
- R1: 4 sc in mc (4)
- R2: (1 sc, inc)×2 → 6
- R3: (1 sc, inc)×3 → 9
- R4: 9 sc
- R5: (2 sc, inc)×3 → 12
- R6: 12 sc
- R7: (3 sc, inc)×3 → 15
- R8: 15 sc
- R9: (3 sc, dec)×3 → 12
- R10-13: 9 sc for 2 rows
- R14: 12 sc
- R15: (2 sc, dec)×3 → 9
- R16-17: 9 sc (2 rows)
Finish off, stuff lightly, leave tail for sewing.
Buttons (make 3)
With black yarn:
- R1: 6 sc in mc (6)
- R2: (inc)×6 → 12
- R3: (2 sc, inc)×6 → 18
Finish off, leave tail for sewing.
Arms (make 2)
With brown yarn:
- Chain 18.
- From 2nd chain from hook: 3 sl st.
- Chain 4, from 2nd chain from hook: 4 sl st.
- Chain 4, from 2nd chain from hook: 4 sl st.
- Crochet 15 sl st to end of row. Turn work.
- R2: 1 ch, BLO 15 sl st.
Hair / Twigs
With brown yarn:
- Make 9 ch, from 2nd ch: 8 sl st.
- 10 ch, from 2nd ch: 10 sl st.
- 8 ch, from 2nd ch: 8 sl st.
Finish off, leave tail for sewing.
Assembly
- Sew the body and head together securely.
- Attach the feet to the bottom of the body so it can stand.
- Sew the buttons along the front of the body.
- Attach arms to the sides of the body.
- Attach the carrot nose to the middle of the head; embed it slightly so it points outward.
- Sew or glue eyes (beads) or embroider eyes, eyebrows with black floss.
- Sew hair/twigs on the top of the head.
- Embroider the mouth.
- Stuff all parts firmly but not overstuffed, so Olaf keeps shape but remains soft.
- Weave in all ends, trim surplus yarn.
Finishing Touches
- Make sure Olaf stands upright — adjust stuffing or placement of feet if needed.
- For extra charm: you can add little twig-arms of flexible pipe cleaners inside the brown yarn arms, or a small scarf.
- Feel free to size up or down by using thicker yarn/hook and adjusting the increases/decreases accordingly.
🪄 Additional Tips & Variations
- If you want a smaller Olaf, use a finer yarn and smaller hook. Adjust the stitch counts proportionally or stop increasing earlier.
- Change colors or add accessories (scarf, hat) for personalized version.
- Use safety eyes if the amigurumi is for a child; otherwise beads or embroidery work fine.
- When sewing head to body, make sure you catch enough stitches and secure well so head doesn’t wobble.
- When stuffing, fill body first before fully closing – shape it nicely so it’s slightly flattened at the base, helping it stand.
- For extra stability, you could insert a small cardboard circle at the base inside the feet, but optional.
- Enjoy the process and give Olaf his big friendly smile 🙂
🎥 Recommended Tutorial